Integrating iPads in Education
  • Home
  • iLearn iPad Blog
  • Getting Started
    • iPad Tutorials
    • Learning about the iPad>
      • iPad Settings>
        • Wi-fi
        • Device information and Software updates
        • General Settings: Sound
        • General Settings: iTunes Wi-fi Sync
        • Quick tips to make your iPad battery last longer
      • iPad Gestures and Multi-touch
      • Moving apps, Deleting apps and creating folders
      • Taking a screenshot
      • Creating albums and and organizing photos on the iPad
    • Apple's Built-in iPad Apps>
      • Photos>
        • Friend or Foe: Mobile device cameras in the classroom
      • iBooks
      • Safari
      • Mail
    • Displaying or Projecting your iPad
  • Essential Apps
    • Your Number 1 App
    • Apps, apps and more apps>
      • Essential Apps>
        • Infuse Learning
      • Elementary Math Apps
      • Elementary Literacy Apps
      • MS/HS ELA Apps
      • MS/HS Math apps
    • Apps Gone Free
    • Downloading apps and the apple ID>
      • How to create a Free (no credit card) Apple ID
  • Video
    • Video
    • Video App Reviews
    • Assistive Technology
  • Presentations
  • Links to other iPad Resources
Follow Me
RETURN TO LEARNING ABOUT THE IPAD

Taking a screen shot

Did you know that you can take photo or "screenshot" of anything you see on your iPad. This handy trick will help you collect evidence of student work, archive important information or create learning resources for your students.   

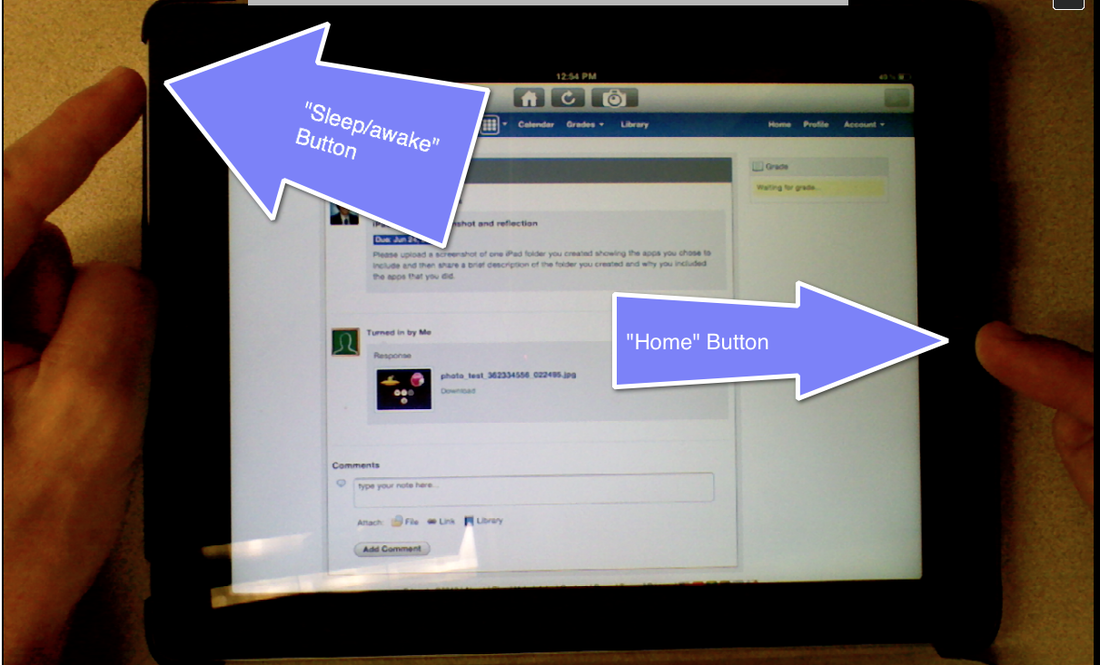
How to take a screenshot

  1. Locate the "home" button and the "sleep/awake" button on the iPad.
  2. Press both button simultaneously for aproximately 2 seconds and then let go at the same time.
  3. The iPad screen should flash white once and a shutter click sound will be audible if the volume is up.
  4. The image of the screenshot is automatically stored in Photos app in the camera roll
Picture
Powered by Create your own unique website with customizable templates.